This is just a quick tip for anyone out there that wants to send a few HTML emails from their desktop and don’t have access to an HTML sending service like MailChimp or something similar. The program is called Thunderbird and it’s made by the same wonderful folks who put together the first-class web browser, Firefox (you are using Firefox, right?). This is not a great option for mailing hundreds of emails out because I’m sure your email host will not be too happy about it. If, however, you want to send out, say, 50 email invites to friends or a tight customer list, this might work for you.
I’m new to this… how will this help?
This is a great way to try out any email templates that you may have created on your own or modified and want to send out. Instead of wasting email credits with your HTML service, try sending out to a few different email clients using the great Thunderbird email client.
Step 1 – What you need
Not just anyone can send out emails using Thunderbird. You’ll need access to the SMTP settings to your email client. Uh oh, did I lose you already? You’ll have an SMTP server if you have a website host (ask your webmaster to get the settings for you if you’re unsure). You’ll need your incoming server name, outgoing server name (typically the same as incoming), the username for the email account, and your email password.
You can also use Gmail as a sort of proxy host but, keep in mind, they set strict limits to the amount of emails you can send out:
In an effort to fight spam and prevent abuse, Google will temporarily disable your account if you send a message to more than 500 recipients or if you send a large number of undeliverable messages. If you use a POP or IMAP client (Microsoft Outlook or Apple Mail, e.g.), you may only send a message to 100 people at a time. Your account should be re-enabled within 24 hours.
I’ll show you how to set up your Gmail account quickly and easily within Thunderbird. Then, you can even check your email, sort it into folders, and save copies on your local hard drive (meaning the computer you’re using the email program on). For some people who have trouble trusting Gmail to hang onto their data (I wouldn’t be too scared but, hey, they aren’t perfect), this might be a nice stress relief.
You’ll also need to download and install Thunderbird (I think you can handle that on your own).
Step 2 – Configure Thunderbird for use
When you first open Thunderbird, it’s going to ask you what you want to set up.

The choice is yours: choose Gmail if that’s the route you want to take or Email account if you have your SMTP settings ready to go.
If you selected Gmail, it asks you for the name you want to use (outgoing name on your email, what shows up as the “sender” for your recipients) and the email address. Click Next, then Finish and you’re ready to go. When you check your email, Thunderbird will ask you for the Gmail password (which you can save by clicking the checkbox when you sign in).
If you selected email account, it first asks you for your sender name and the email address you wish to add. Select the type of server you’re using (IMAP should be available on most standard SMTP servers but if you have a problem, you can delete the account and re-add it as POP), input the server name, and click Next. Finally, input the user name for your SMTP server, click Next, input an account name (whatever describes the account in the Thunderbird window), then Next, then Finish.
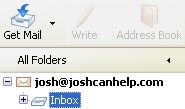
If everything worked out well, click on the Inbox name in the left-hand window and Get Mail.
Step 3 Write a new email
If everything worked as planned, you should have the email from the email account you chose in your inbox now. Keep in mind, because this client is now linked to your email box, moving or deleting mails here will do the same on your other account. If you plan on continuing to use your other email program, I would just ignore the emails here and just use Thunderbird to send.
I suggest trying to send an email to yourself to test the account out. Just click Write, input your email address, and click Send. Make sure it goes and and that you receive it. If that all went well, it’s on to sending HTML!
Click Write again to open a new email and click on the main body of your email. Now, in the menus at the top of the email, click Insert, then HTML…
ht
A small window opens up and, guess what? All you do is paste your HTML code into this window. Find your HTML file, right-click it, open it with Notepad or another plain-text editor, click CTRL+A to copy everything, then CTRL+C to copy everything. Go back to the little Thunderbird window and type CTRL+V to paste it. Simple!
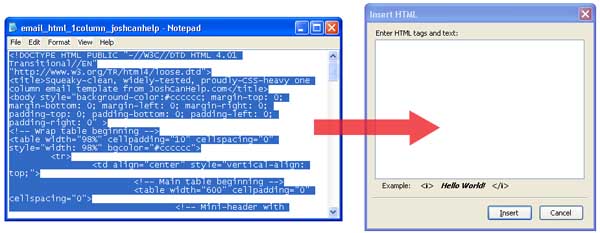
Just click Insert on the Thunderbird window and you should see your HTML designed email in the Thunderbird window. Just add a subject, some recipients, and send it off! Make sure to select one of the options that allows for HTML (like HTML and text or just HTML).
Remember:
- Make sure that code is well-formed, images are small, and your reason for sending HTML is benevolent. See my HTML email guide, please!
- Using this method, keep your recipient list SHORT. This is NOT a good way to push emails to a bunch of people. Start getting a lot of bounces (invalid or rejected addresses) or spam clicks and you could get banned from your SMTP.
< Take Action >
Comment via:
Subscribe via:
< Read More >
Tags
Newer
Sep 18, 2008
Dripping my way along... a lesson from Seth
If you put your name on it, put your best into it. The work you do now could come back to haunt you later and it’s up to you whether this phantom is benevolent or not.
Older
Sep 11, 2008
HTML emails: the last word (until everything changes again)
Here is everything I know about creating HTML emails. This is the most boring and most useful post I’ve ever created by far.